It's hard not difficult to say to a computerized system. It's not easy to say simple. Although there are many DIY accessories in the New Year off the road, but many users are not ready to give themselves a new computer, and the problems with the installation system jumped out. Some users want to reinstall the system for the computer in the New Year to make the old computer glow, but also inevitably reinstall the system. For these needs we will explain how to install the system faster.
We will use WinNTSetup this system installation software, after which we will use it to install the Windows operating system. According to the actual situation, we have two ways to use this software: one is to install the system on a brand new computer, you need to put it on the WinPE U disk, the common WinPE toolbox will also this software. The second is to start it directly on a computer with an existing operating system and directly specify the disk partition for installation.
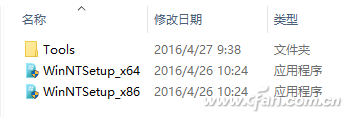
Of course, no matter which method you choose, you need to prepare the Windows installation image (ISO file) and WinNTSetup in advance, and choose the appropriate startup program according to the version of the system you want to install. 64-bit select WinNTSetup_x64, 32-bit select WinNTSetup_x86.
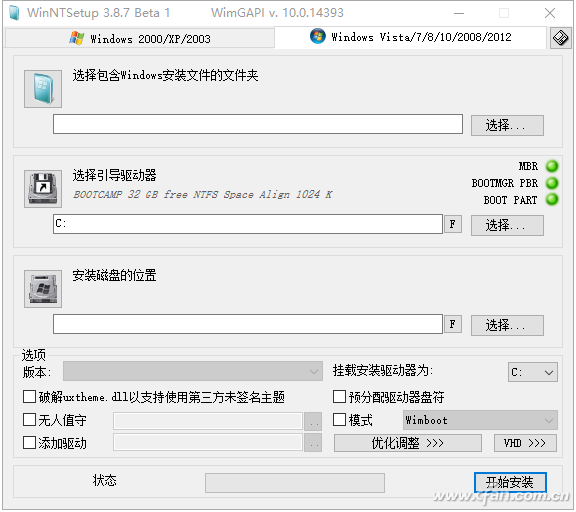
This software is more intimate to divide the Windows system into two kinds, after the installation software starts, will need according to you want to install Windows XP and the following version chooses the left side label, Windows 7~Windows 10 chooses the right label then.
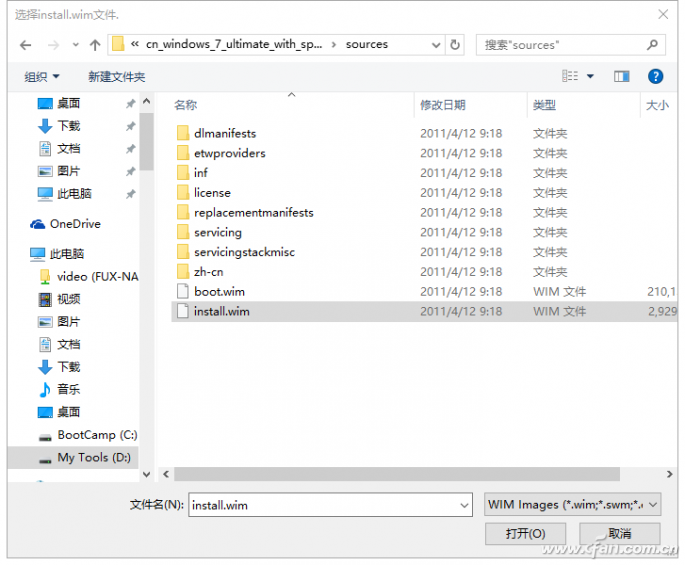
First you need to locate the location of the install.wim file. You can find the install.wim file in the sources directory of the Windows ISO image that is loaded or decompressed by the virtual CD-ROM drive.
Then set the boot disk and the installation disk location. Which disk you want to install Windows to, you can set which disk. If you don't understand a setting item, you can move the mouse over it and a prompt message pops up.
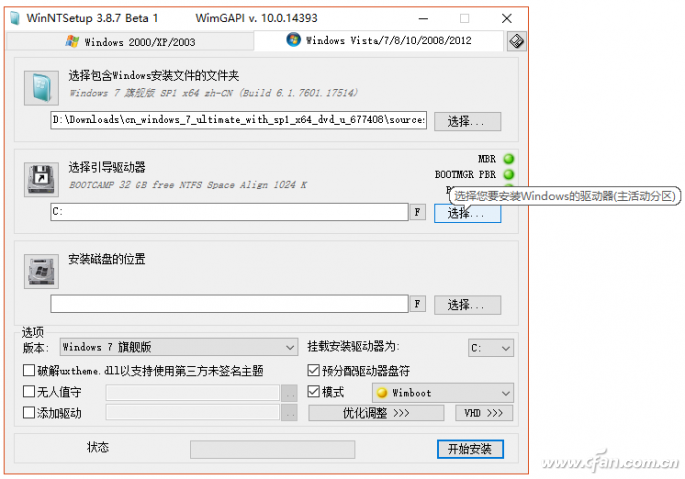
Note that there are two options in the lower right corner. One is "Mount and mount the drive." By default, the drive letter is selected to install Windows; the other is the "pre-allocated drive letter." This must be checked. , otherwise there will be problems with drive letter confusion after installing the system.
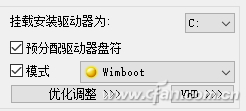
If you want to change and optimize the installed system, you can click the "Optimize adjustment" button to open the system optimization settings interface.
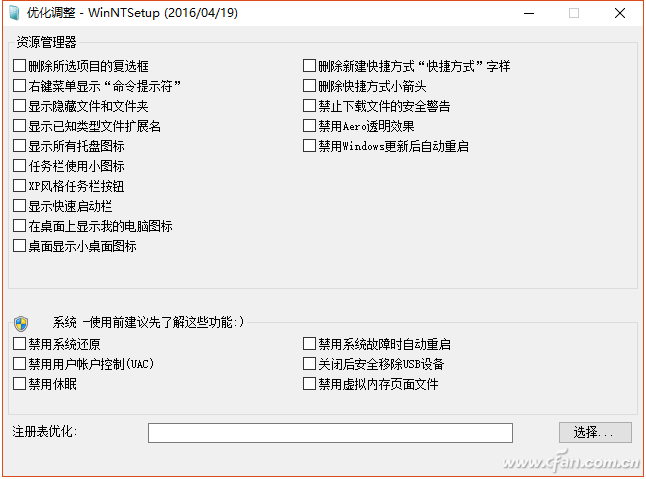
Here, some optimization settings can be set in advance for the installed operating system, which reduces the trouble of setting up after installation. "Add Driver" can choose to install the hardware driver silently through software. And "unattended" you need to do the appropriate script, of course, we still recommend that when installing the system or try to observe the side, so as not to skip the key project settings, reinstall after the occurrence of problems.

After the installation of the system is complete, click "Start Installation". At this point, the "Ready to Install?" window will pop up.
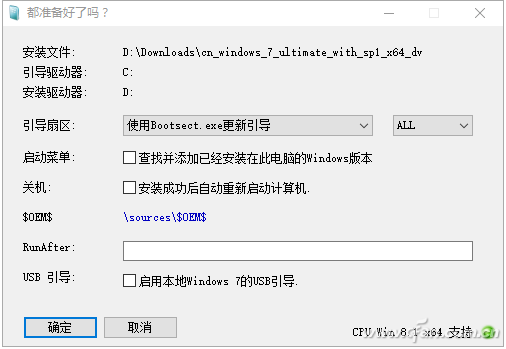
Select "Use Bootsect.exe to update boot", the system will support UEFI mode (need to open the option in the BIOS first); if you want to build a dual system or multiple systems with the existing system group on your computer, you need to check " Find and add the version of Windows that is already installed on this computer"; it is recommended to check "Automatically restart the computer after successful installation".
Finally click "OK" and WinNTSetup will start installing the Windows image. We can slowly wait for the new Windows system to appear in front of this method is very simple, right?
Suizhou simi intelligent technology development co., LTD , https://www.msmsmart.com
